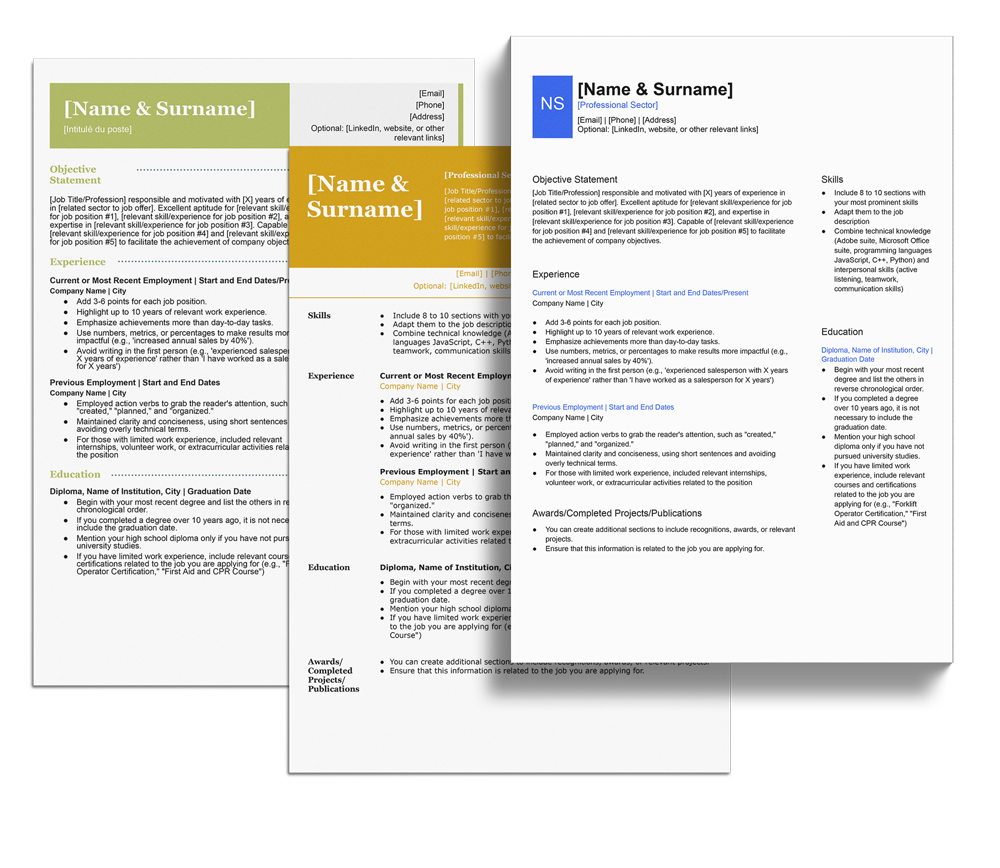
You can craft a CV in Word in two ways: with or without a CV template.
Whether you’re starting from scratch or using a professional CV template to guide you, CVHelp is here to assist you in building a CV that effectively showcases your professional skills and experiences to hiring managers.
How to create a CV in Word without a template?
Fed up with preconceived CV templates that don’t quite meet your needs nor fit your style? Then it’s time to find out how to make a CV without a template!
In this section, you’ll learn how to create a professional Word CV without using a predefined template. Continue reading to learn how to create a unique, personalised document that will showcase your professional background, relevant experience and skills.
Follow the steps below and discover how to make a CV from scratch in Word:
1. Open a new document
- Open MS Word.
- Click on “File” in the top left-hand corner of the window.
- Select “New” from the drop-down menu.
- Click on “Blank document” to open a new document.
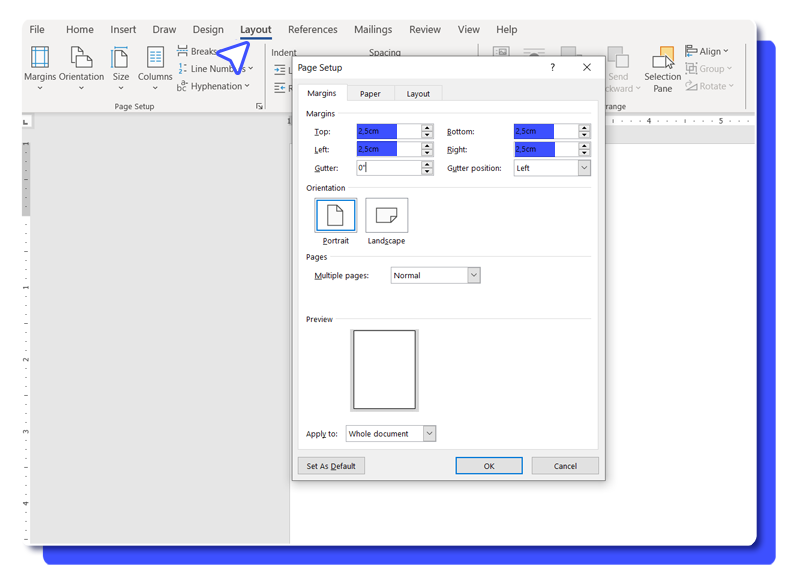
2. Set the dimensions and margins
- Click on “Page layout” in the ribbon at the top of the window.
- Click on “Margins” and choose “Custom margins” at the bottom of the drop-down menu.
- Set the margins to 2.5 cm (1 inch) for top, bottom, left and right.
- Click OK to apply the changes.
3. Enter and organise your information
- Type your name at the top of the document and make it bold by selecting the text and clicking on “Bold” (or by pressing Ctrl + B).
- Press “Enter” to move to the next line and type your contact details (address, telephone number and e-mail address).
- Press ‘Enter’ twice to leave a space, then type ‘Work experience’ and bold it.
- Press “Enter” and start listing your professional experience, starting with the most recent. For each experience, indicate the name of the company, your position, the dates of employment and a list of your responsibilities and achievements.
- Repeat this step for the “Training” and “Skills” sections, as well as any additional ones you might like to include, bolding the titles of each section.
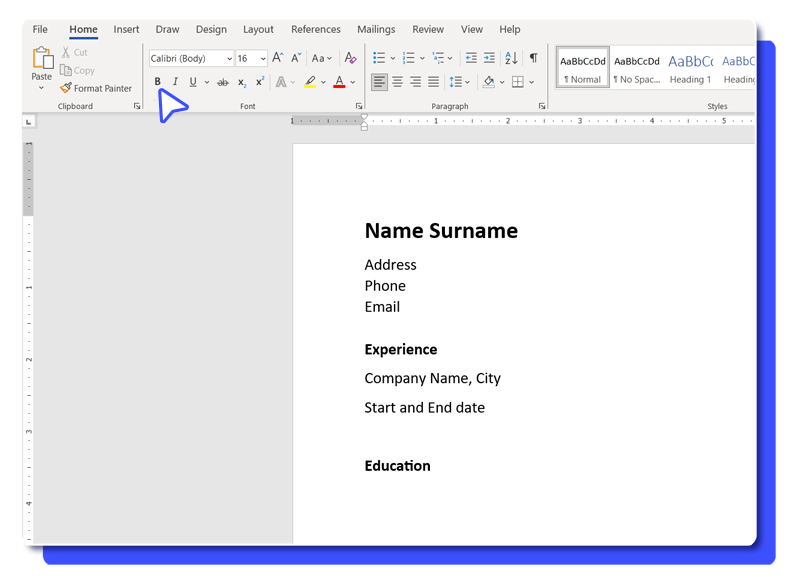
4. Edit the text layout
- Select the text you want to format.
- Click on the “Home” tab in the ribbon at the top of the window.
- Use the drop-down menus to choose the font, size and text style (bold, italic, underlined, etc.).
- Repeat these steps for each section of your CV.
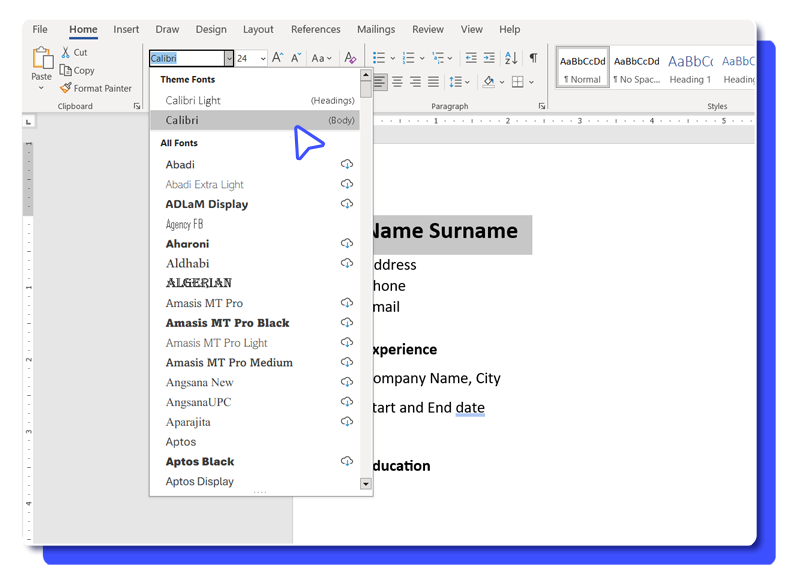
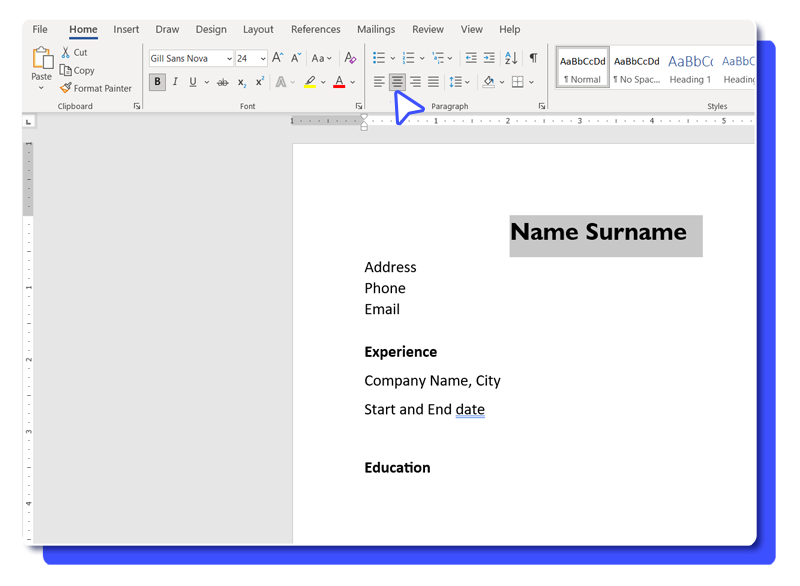
5. Edit the layout and align the text
- Select the text you want to align.
- Click on the “Home” tab in the ribbon at the top of the window.
- Use the “Align left”, “Centre”, “Align right” or “Justify” buttons to align the text according to your preferences.
- Repeat these steps for each section of your CV.
6. Add visual elements
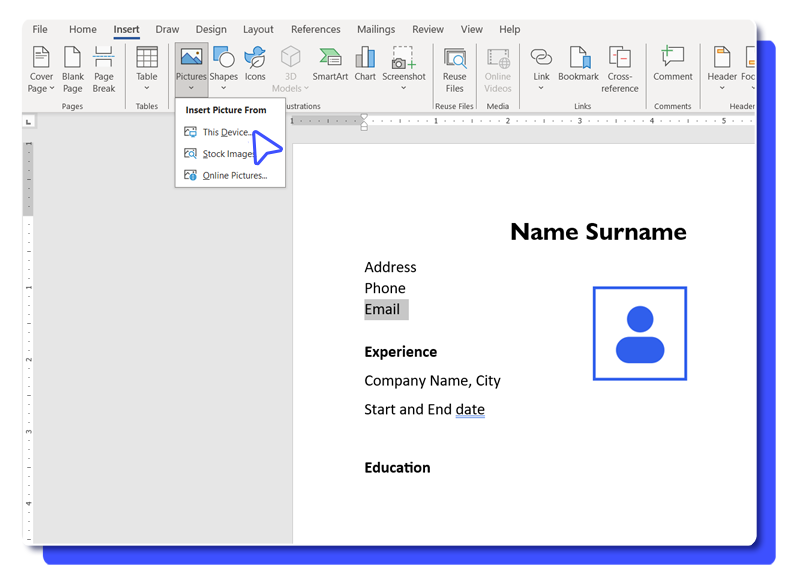
- Click on the “Insert” tab in the ribbon at the top of the window.
- Use the “Shapes”, “Images” or “Icons” options to insert graphic elements into your CV.
- Resize and move the graphics as you wish.
7. Revise and save
- Read over your CV carefully to check spelling, grammar and consistency of information.
- Click on “File” in the top left-hand corner of the window.
- Select “Save as” and choose a location to save your CV.
- Name your file (for example, “CV_Name.docx”) and choose “Word Document” as the file type.
- Click “Save” to save your CV.
Follow these steps and you’ll be able to create a template-free Word CV tailored to your needs and style, even as a Microsoft Word beginner.
How to make a CV in Word from a template?
Want to create an eye-catching CV but don’t feel like spending half your day on it?
You are in luck! In this section, you will find out how to quickly create your CV from a Word template.
We’ll explain how to select the best Word template for you and customise it to save time and get a quality result.
But first things first: What are Word CV templates? They simply are pre-formatted recruitment documents that make it easy to fill in your personal details, employment history, skills and education. Thanks to them, you don’t have to worry about CV layout and formatting anymore.
The best CV templates provide a solid basis for creating a coherent, well-structured CV that fits the job description while still giving you the freedom to customise the visual and textual elements.
1. Open a new document from a template
- Open MS Word.
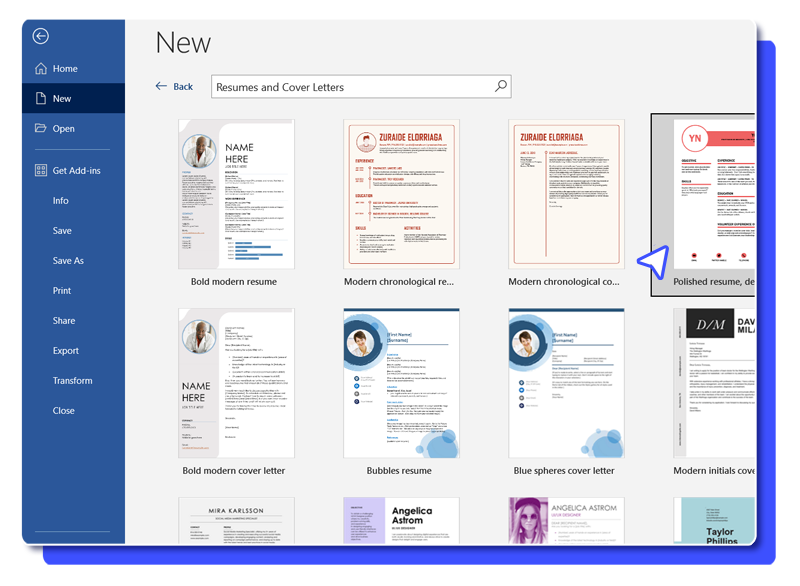
- Click on “File” at the top left, select “New”, and in “Search for online templates”, type “CV” and press “Enter”.
- Select your preferred template and click “Create” to open a new document based on that template.
2. Replace the generic information with your personal details
- Click on the text boxes containing generic information such as “Name”, “Address”, “Telephone number” and “E-mail”.
- Replace the generic text with your own details.
3. Customise the “Professional experience”, “Training” and “Skills” sections
- Locate the corresponding sections in the template.
- Replace the generic text with your own information and add or remove blocks of text as required.
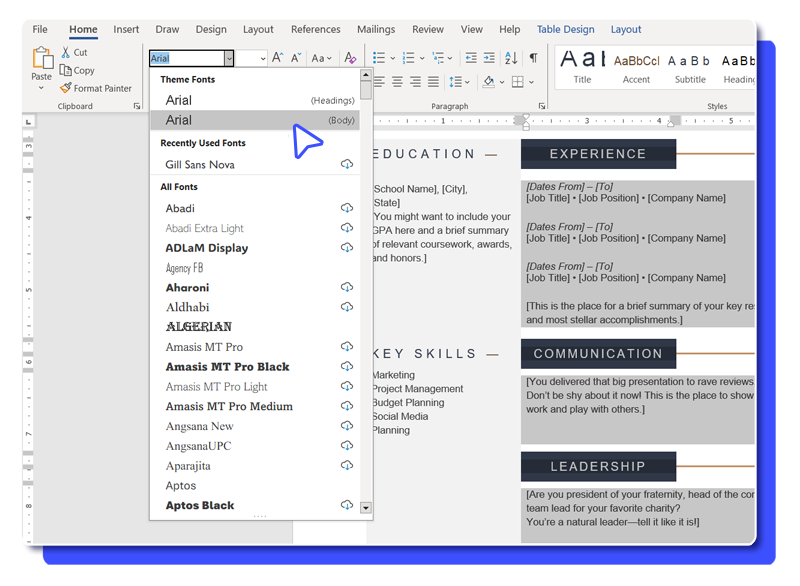
4. Change the formatting of the text
- Select the text you want to format and use the menus on the “Home” tab of the ribbon to make adjustments.
- For visual enhancements, go to the “Insert” tab for options such as “Shapes”, “Images” and “Icons”.
- Adjust the size, position and colours of the graphic elements.
5. Proofread and save your document
- Check the CV carefully for spelling, grammar and consistency.
- Click on “File”, select “Save as” and choose a location to save your CV.
- Name your file (for example, “CV\_LastName.docx”) and select “Word Document” as the file type.
- Click on “Save”.
By following these steps, you can create from a template a Word CV adapter to your specific needs and style.
The main advantage of this approach? The enormous amount of time you save, especially if you’re new to using Microsoft Word.
